
This guide outlines a midline approach to accessing the epidural space (between the spinous processes) using lateral views.
For a contralateral oblique approach, see our separate guide.
Table of Contents
Name of Procedure
- CESI – Cervical interlaminar epidural steroid injection
Sample Opnote
Goal
To access and then administer steroid to the cervical epidural space.
Indications
Usually to treat degenerative disc disease or central or neural foraminal stenosis that is causing radicular symptoms into the arms.
Contraindications
Anatomy
(coming soon…)
Equipment/Skills/Setup
Core Equipment/Disposables: See our disposables/equipment article for “core” items that are common to all procedures.
Core Skills: See our guides to obtain images of the cervical, thoracic, or lumbar spine. Then steer a needle to direct it under the skin.
Special items and suggested setup for this procedure:
- Wheelchair
- 20g x 3.5″ Tuohy epidural needle
- LOR syringe
- 3cc 1% lidocaine in 3cc syringe with 25g x 1.5″ hypodermic needle for subcutaneous local anesthetic
- 2cc saline + 1cc steroid in 3cc syringe to hold injectate
- 3cc contrast in 3cc syringe
Landmarks and Patient Positioning
- Have the patient sitting in a standard wheelchair
- Place the C-arm parallel to the floor.
- Wheel the patient face forward to the open side of the “C” on the c-arm.
- The goal is to get the patient facing the C-arm operator with the posterior neck in between the two ends of the C-arm so you get a lateral view
- Have the patient drop their shoulders down (don’t put elbows on the arm rests)
- Flex the head against the neck
- Do NOT lean the patient forward or they’ll fall out of the C-arm view.
- Just like a lumbar epidural the goal is to get the spinous processes to open up but to keep patient in position and just “curled” forward at the neck.
Cervical positioning is particularly difficult and important for a smooth procedure. Please see many important notes in our overview guide.
Technique
- Once the patient is positioned as above you should have a lateral view of the C-spine.
- We’ll target the C6-C7 or C7-T1 interspace. Usually you can start by pressing your thumb over the most prominent portion of the cervical spine. This will be around C7.
- From here you can localize the skin and advance the need to anesthetize the subcutaneous tissue.
- Once this is partway in you can check and image to see the trajectory of the needle and see which trajectory you’ll take with the tuohy needle and anesthetize that track
- Remove the hypodermic needle but keep track of the entry point and the trajectory that you noted above.
- Insert the tuohy needle (with stylet in) along the same track.
- You’ll enter as far as you know is safe only and then check an image to confirm trajectory.
- Re-orient the needle as needed to advance to the target interspace.
- You can advance slightly and check images as you go till you get near the epidural space. Alternatively you can just advance under live fluoro.
Example of anesthetizing the track and initial needle placement
- After getting close to the epidural space you’ll remove your stylet and advance using a continuous loss of resistance (LOR) technique similar to lumbar spine epidurals.
- Use other cues to check your progress to stay within safe limits:
- If you find your advancing more than you expected based on the last image, check another image.
- Check your medial-lateral orientation by physically looking at the patient and needle. You can also check an AP image but it often isn’t necessary.
- Use other cues to check your progress to stay within safe limits:
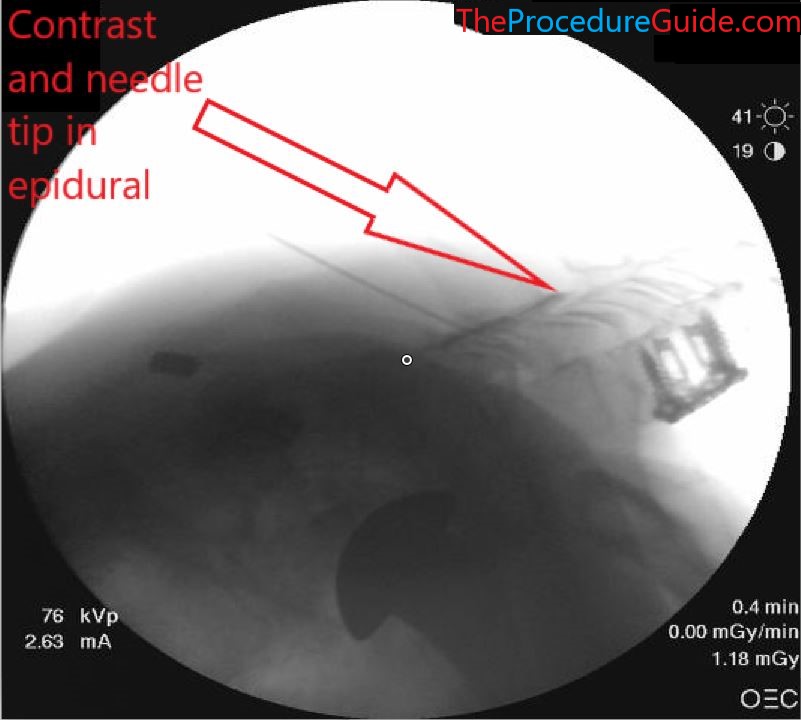
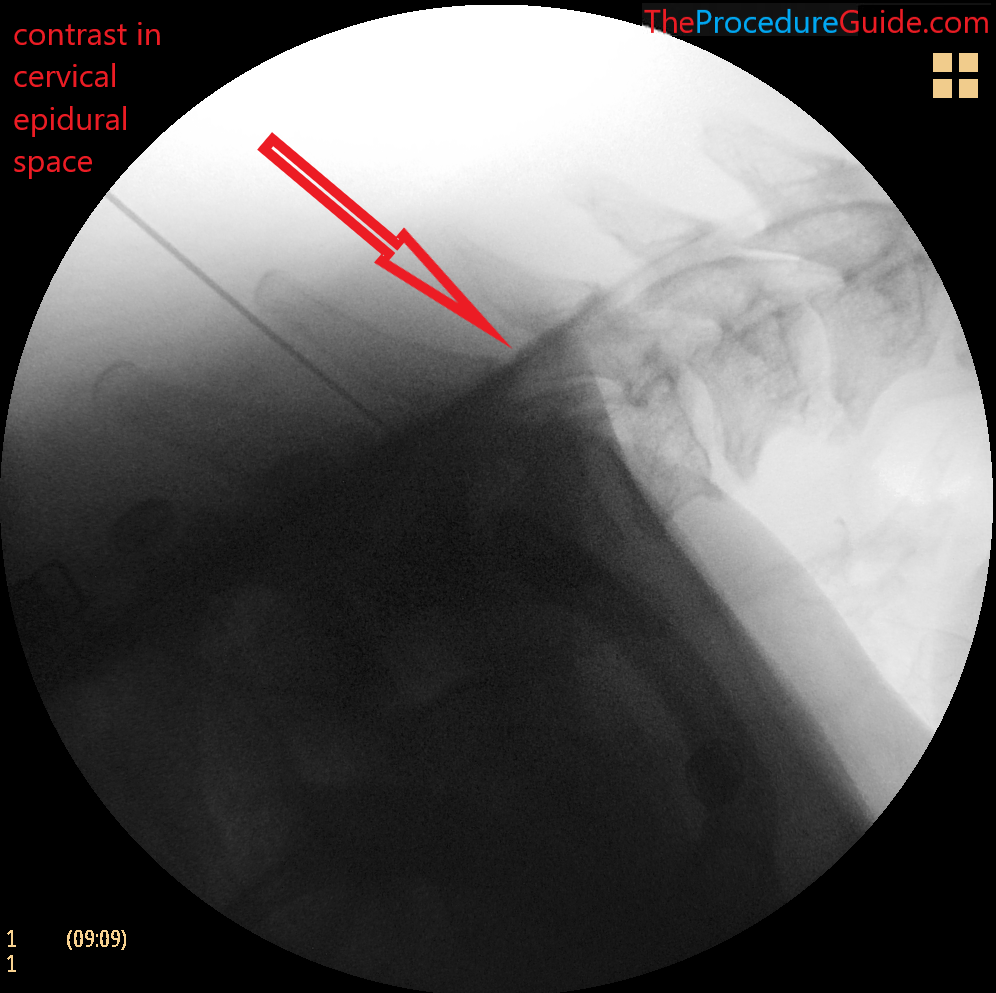
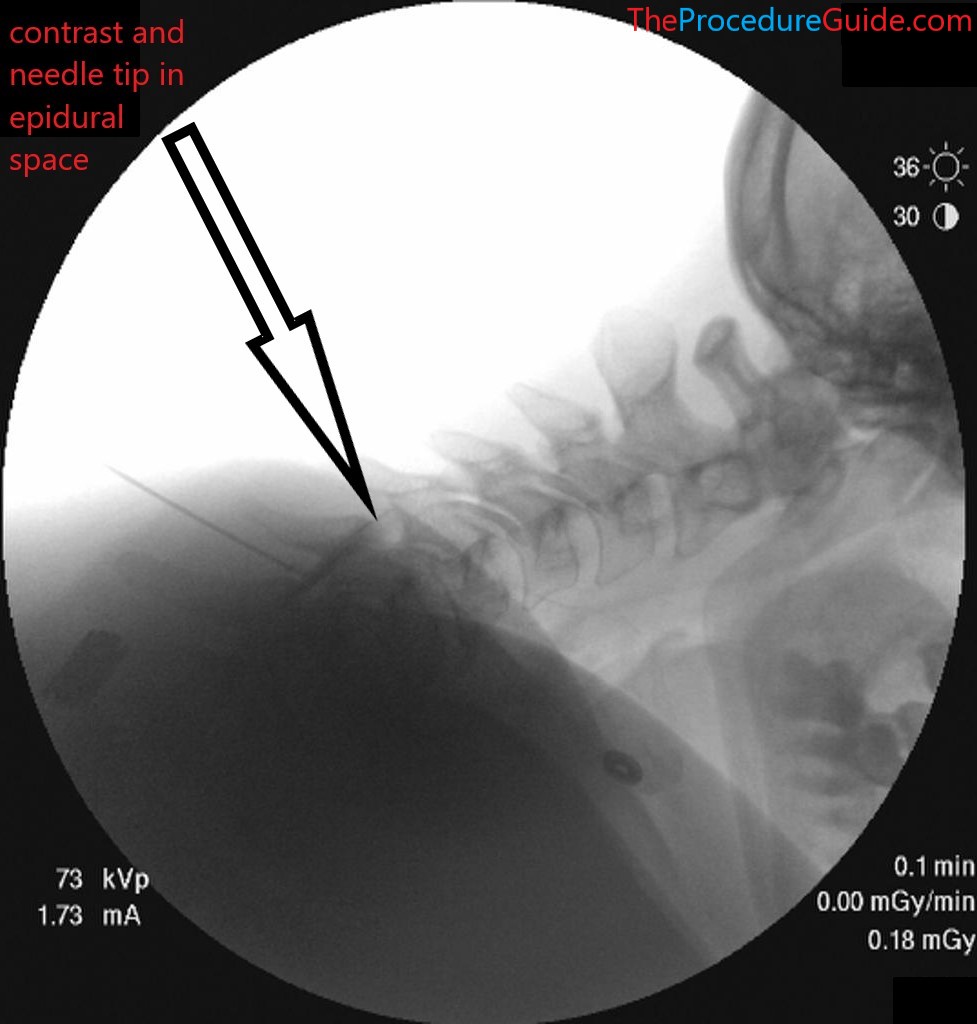
- Once you have LOR, remove the LOR syringe, and hook up the contrast syringe
- Injection contrast. Live injection can help you see nice superior/inferior epidural spread and rule out vascular uptake.
- Now simply inject the saline and steroid medication.
- Remove the needle smoothly.
Tips
- As noted above careful positioning is key
- To move quickly through the procedure and still prevent dangerous mistakes (like injecting local anesthetic into the epidural space) a few tray setup techniques can help:
- Have someone inject saline while you are looking at the tray to confirm that you know for sure only saline is being drawn up into your syringes.
- Have only one syringe for lidocaine for subcutaneous anesthetic. It can be a different syringe like a 5 cc syringe.
- Safety markers
- In the images above you can see where the epidural needle tip should land. If your needle is past that point you may have missed the loss of resistance which is dangerous. Or you are lateral to midline, which is why you haven’t yet gotten loss of resistance.
- Therefore you can use that line as a safety barrier, never advance your needle past that point.
- But, remember that if your lateral fluoro view isn’t well aligned (ie, slightly oblique), then that posterior line isn’t actually the posterior border of the spinal canal. In this case, use that line with caution as a safety barrier.