
Table of Contents
Name of Procedure
IUD (Intrauterine Device) Removal
For replacement, see the IUD insertion article
Sample Opnote
Goal
Removal of an intrauterine device
Indications
- Desired pregnancy
- Side effects from the IUD
- IUD has reached the approved amount of time for effective contraception
- Non-hormonal IUD: Paragard: Copper IUD; 10 years
- Hormonal (levonorgesterol) IUDs: Mirena: 7 years; Liletta: 6 years; Kyleena: 5 years; Skyla: 3 years
Contraindications
No absolute contraindication
Anatomy
See below for landmarks and patient positioning
Equipment/Skills/Setup
Simple
- Gloves
- Speculum
- Large cotton Q-tips, long or large cotton swabs
- Sterile Ring Forceps
Sterile
- Gloves
- Speculum
- Tenaculum
- Ring forceps
- Cytobrush
- Alligator forceps or IUD hook
Landmarks and Patient Positioning
Dorsal lithotomy
Technique
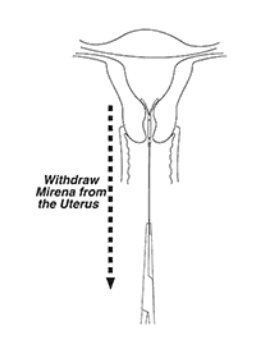
- Simple IUD removal when strings are visible:
- Wear gloves, and insert the speculum and locate the cervix
- Locate the IUD strings at the cervical os
- Use ring forceps to grasp the string and remove the IUD by placing gentle traction on the strings and pulling it out
- Ensure the IUD is intact and no portions are missing
- If strings are not visible:
- Use a cytobrush in the cervical os to try to tug the strings out, then follow the steps above to remove the IUD.
- If unable to fish the strings with a cytobrush then the patient may need alligator forceps or even a laparoscopic procedure under anesthesia. These procedures are beyond the scope of this article and evaluation by a gynecologist may be the next step.
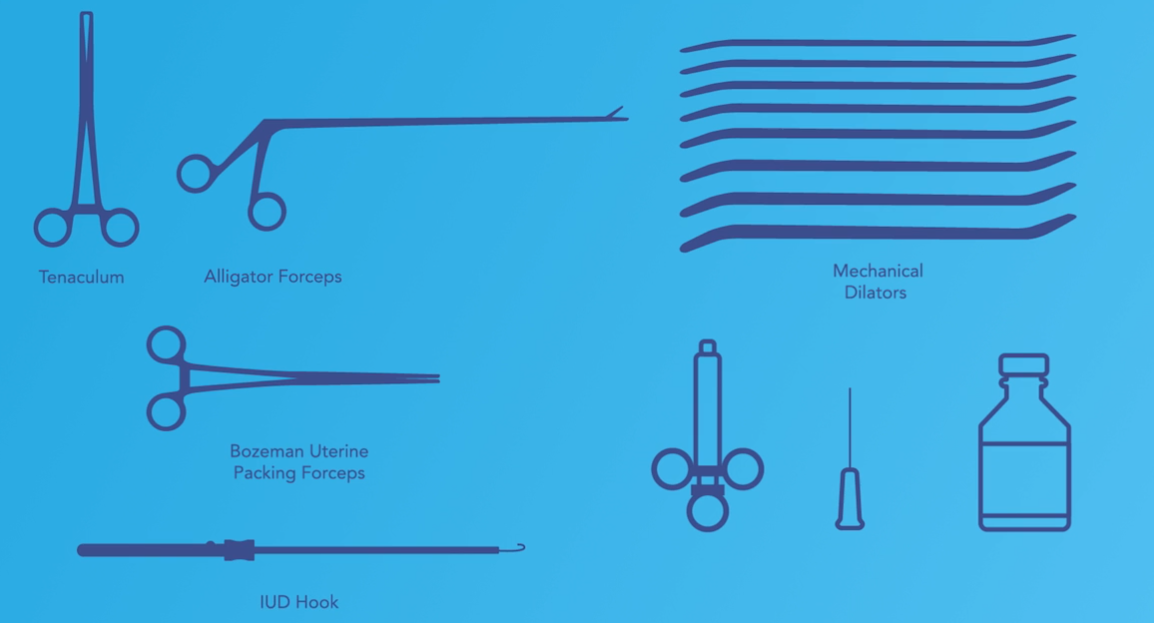
Tools needed for IUD removal when strings are not visualized
Tips
- If the strings are not visualized on a pelvic speculum exam, consider pelvic US to determine the IUD location and refer to gynecologist