
Table of Contents
Name of Procedure
- Blood draw
- Phlebotomy
- Venipuncture
- Venous blood sampling
Goal
To obtain a venous blood sample for diagnostic purposes.
Indications
Any need for a blood sample, usually for various diagnostic tests.
Contraindications
- Local skin infection, inflammation, trauma or burns
- Lymphedema or DVT in the extremity (choose another extremity)
- IV infusion running in the same extremity as the sample collection (choose another extremity)
- AV graft or fistula in the same extremity (choose another extremity)
Anatomy
For the purposes of a blood draw, you generally just need to find IV access like you would for a peripheral IV placement.
This isn’t an exhaustive review of anatomy. There are many places to start an IV/obtain IV access and a lot of variability in superficial venous anatomy, so no anatomical review will be complete.
Usually for adults, you just need to know if you’ve found a good target, rather than the details of the anatomy. For children, however, some specific anatomic knowledge is helpful as you may not be able to feel for veins well.
The antecubital fossa and dorsum of the hand are very common sites for IV/venous access and so some basic knowledge here might help (although there is variability):

Equipment/Skills/Setup
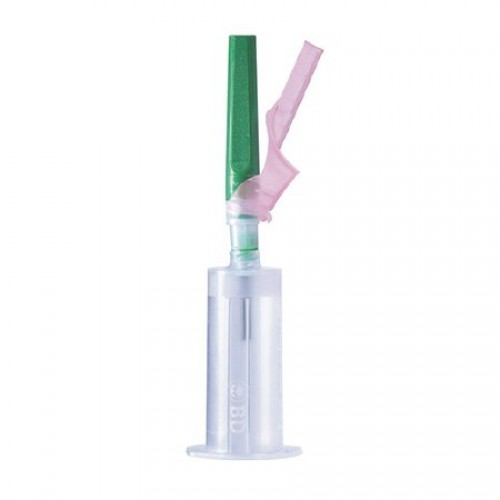
Needle Collection Device
- Simple Needle
- This is just a needle that has a luer adapter on the end so you can attach a syringe.
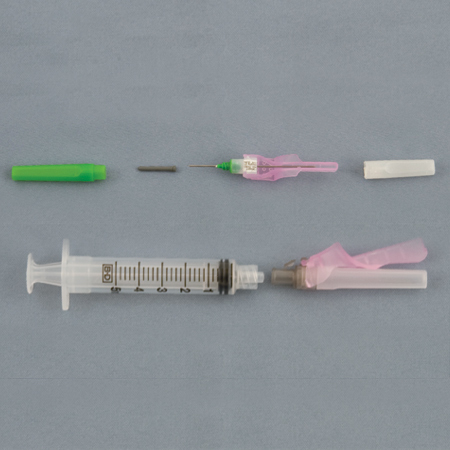
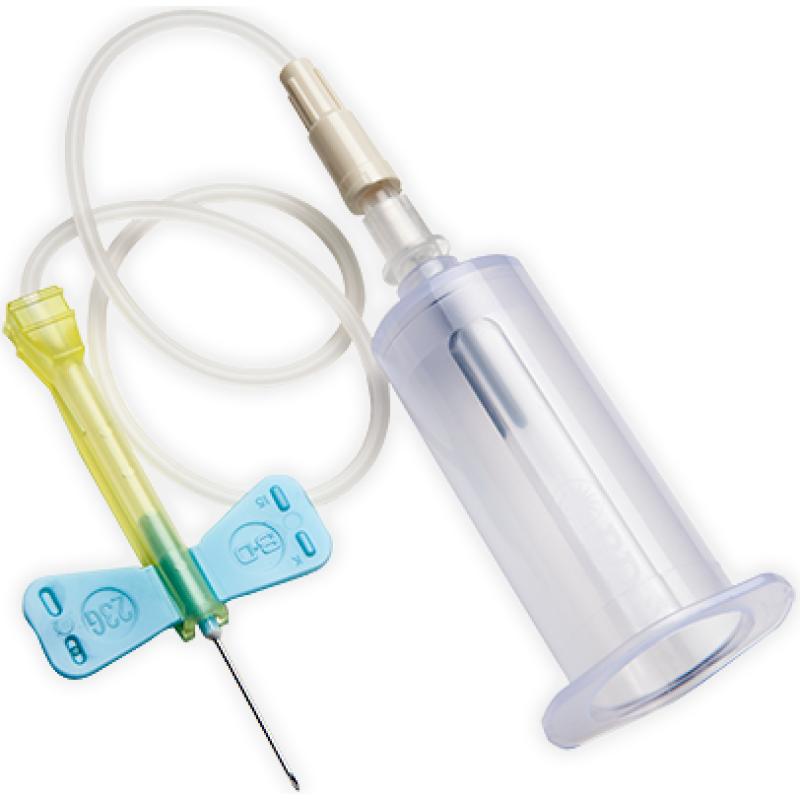
- Winged needle (with tubing)
- Advantages:
- Easier to keep the needle still while changing tubes
- Might have a flash chamber to indicate when the needle enters the vein
- Disadvantages
- Unwieldy with tubing and this could lead to accidental needle sticks
- Might be more expensive
- Might be a smaller gauge needle and could lead to hemolysis, effecting lab results.
- Advantages:
- Tube Holder
- This is an adapter that goes where the syringe would go (on either a simple needle or winged needled) and is used for vacuum sealed tubes. The tubes are punctured by a needle within the holder and the vacuum draws out blood.
Basic Supplies
- Labels for specimen vials
- Can be created/applied after sample collection, but should be available so you aren’t carrying unlabeled specimens after the procedure.
- Gauze pad and tape
- Tourniquet
- Antiseptic wipe such as a basic alcohol pad
- Possibly a warm pack if the vein is difficult to find
Landmarks and Patient Positioning
This will vary greatly with the insertion site, but there are a few basics to keep in mind:
- Treat this like any other complicated procedure: a little time during setup and patient positioning is very important.
- During insertion, keep the insertion site below the level of the heart to allow blood to pool into the veins
- The patient should be in a comfortable position while keeping the insertion site exposed. Odd angles, poor site access, etc. will reduce your chances of success.
- You want to be in a comfortable position yourself to improve your chances of success (use a stool, chair, etc.).
- You often need to do tasks one-handed. Have supplies easily accessible and on a surface where items can be picked up/put down and kept secure/clean/organized.
Technique
Preparation
- Collect the immediate supplies that you’ll need right before and after the needle is inserted:
- Tourniquet
- Alcohol to clean the skin
- Primary needle/blood collection adapter
- Sample collection tubes (laid out in order of draw)
- Gauze with tape to cover the wound
- Have everything opened up and ready to grab for ONE HAND use (i.e. caps off, out of packages, piece of tape cut, etc.)
- All the other items (labels, more tape, etc) can be collected later.
Find A Target And Insertion Point
This is the most important step and takes time and experience. These are guidelines, not rules, and there are always exceptions:
- AVOID using the flexor portion of the wrist as this site tends to have smaller veins and might be slightly more uncomfortable for patients.
- DO use a segment of vein that is long enough and large enough to cannulate.
- Look for a vein that is clearly visible and/or one that you can palpate with a rubbery/bouncy feedback.
- For venipuncture you don’t usually insert the needle very far; So you can usually enter the skin just a few millimeters distal to where the vein is visible/palpable.
The forearm/antecubital fossa tends to be the best options for most people and in most situations.
Apply Tourniquet
- Before applying:
- Keep the insertion site at or below the level of the heart for a few minutes
- Try having the patient make/relax a fist several times if inserting in the hand/arm (unless you are drawing a potassium diagnostic test since fist pumping can falsely elevate the values).
- Try warming the insertion site to improve blood flow to the area
- Apply the tourniquet anywhere proximal to the insertion site but not too far from the site.
- It may be mildly uncomfortable for the patient as the tourniquet should be tight.
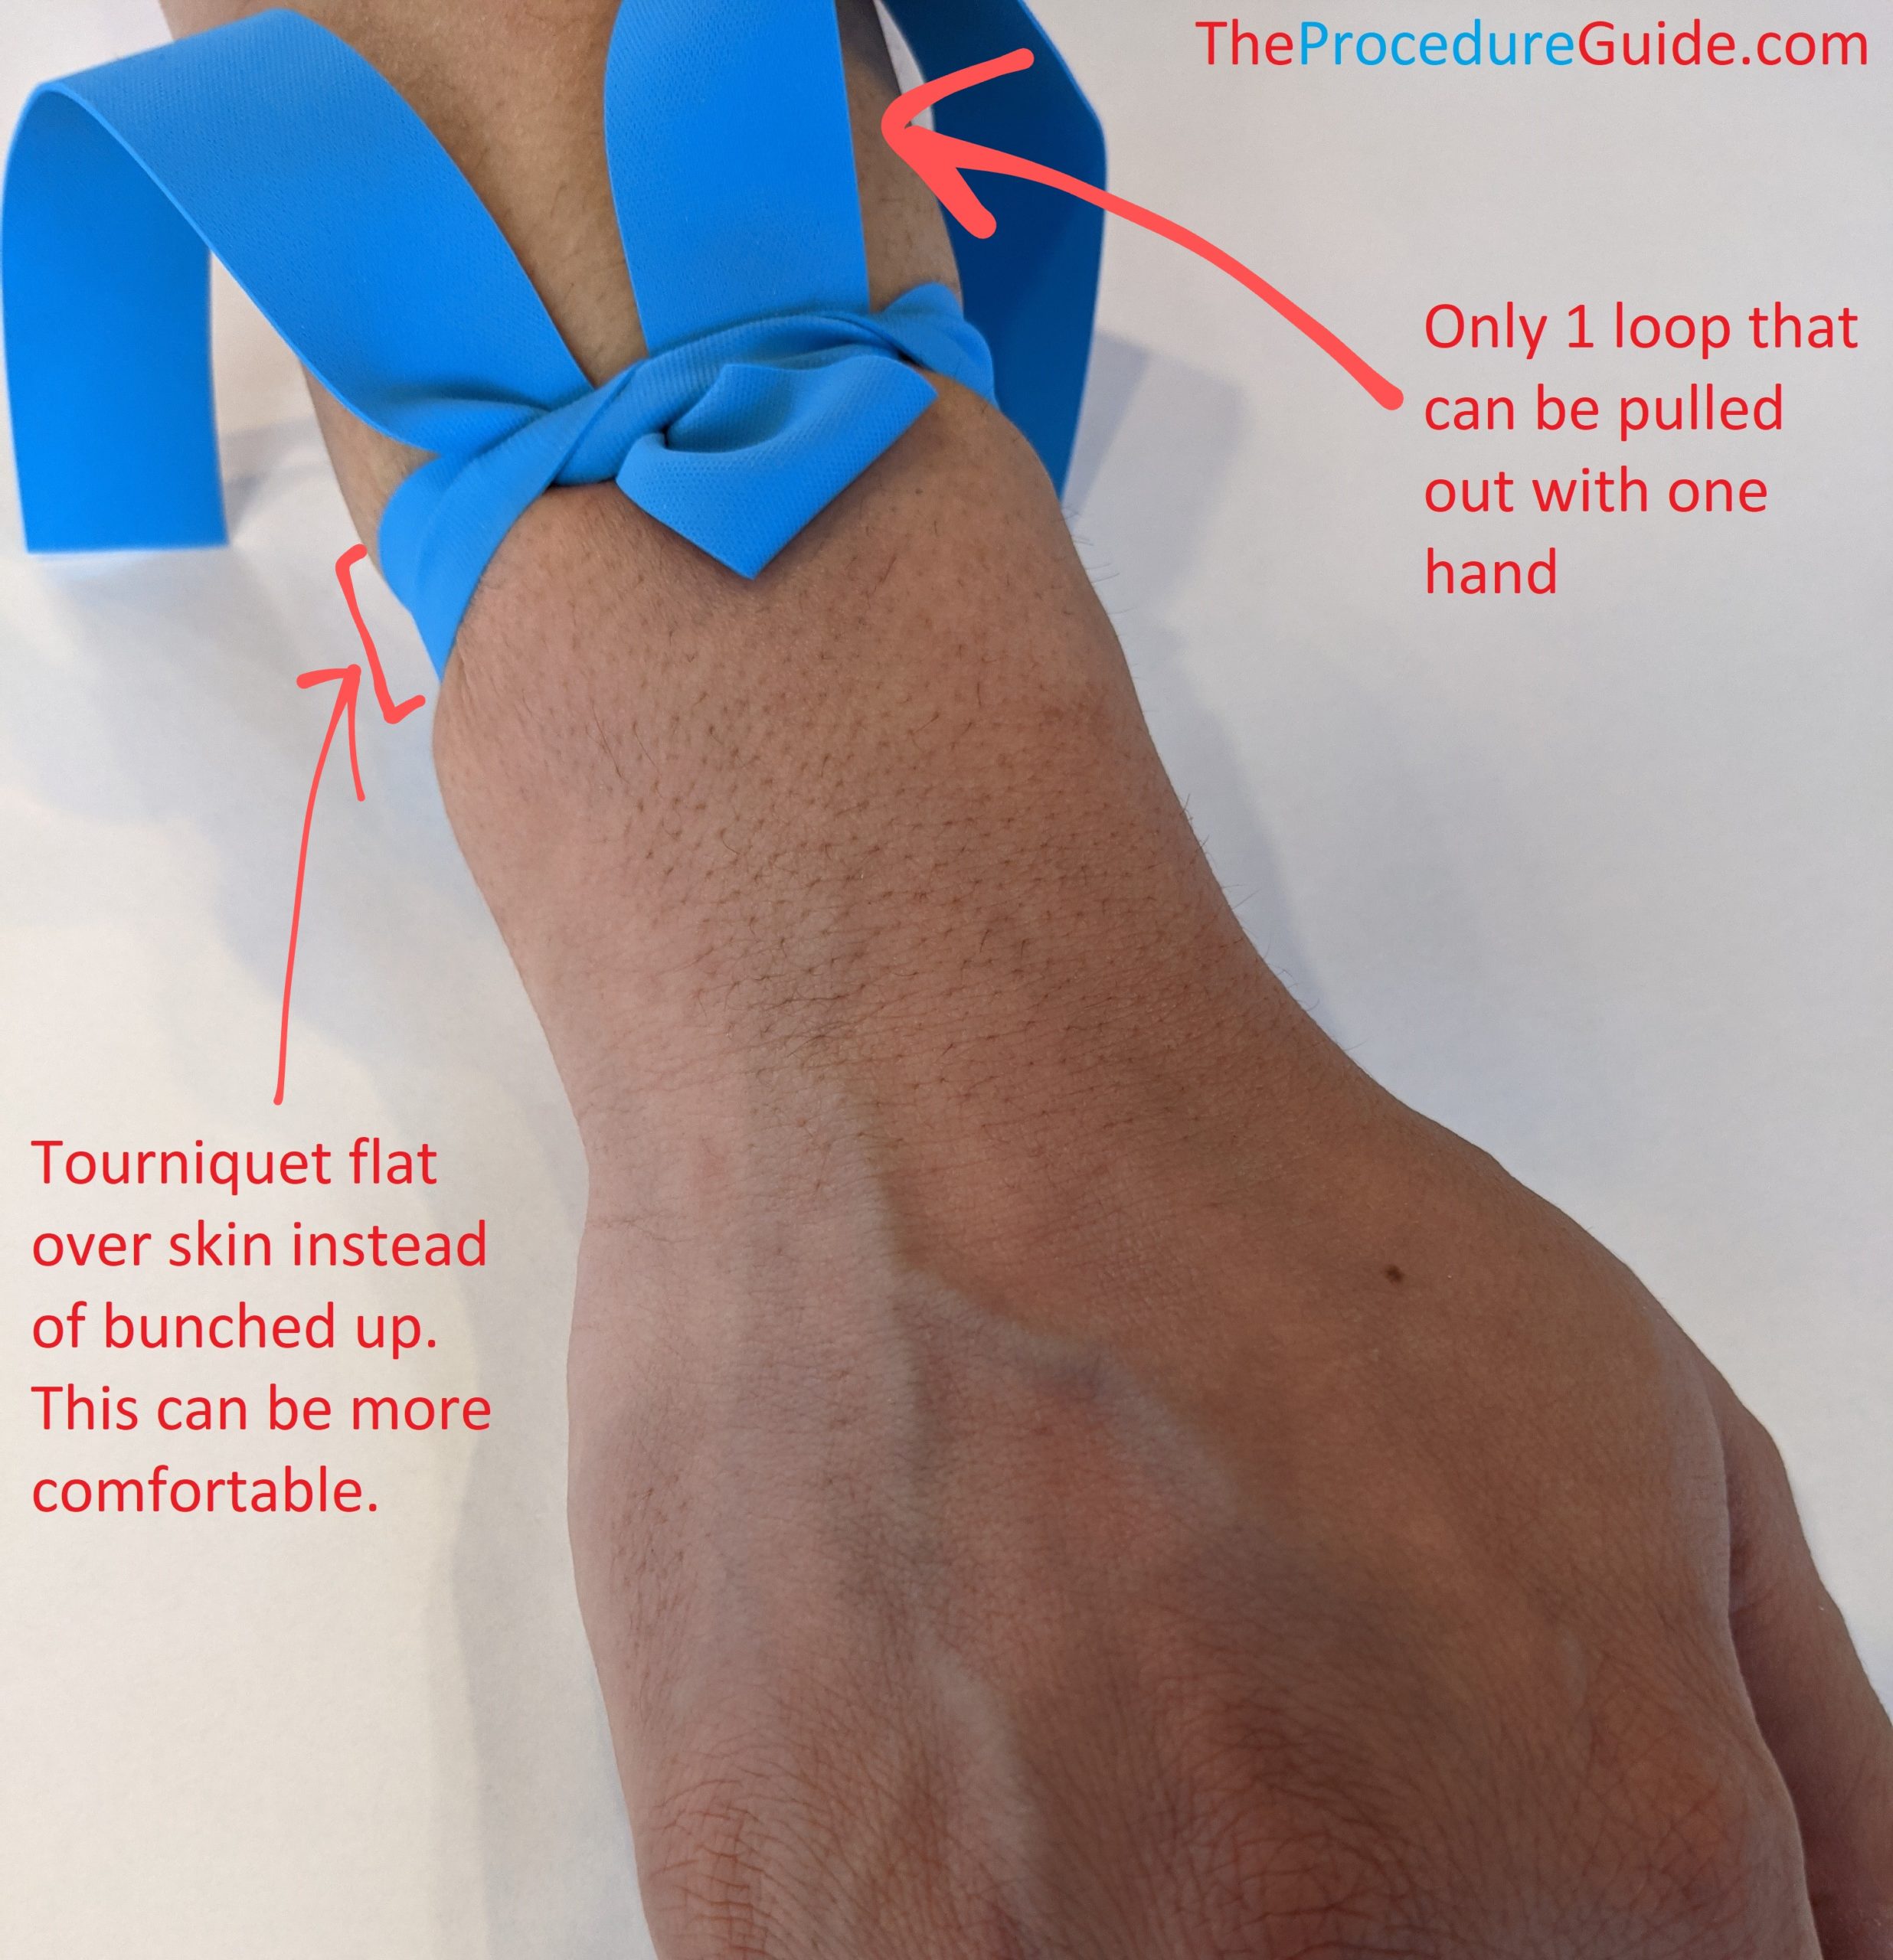
- The tying technique is important: you want to be able to release a tourniquet with one hand.
- Tying it like a shoelace does not allow you to do this.
- Note that it’s just like the first step of tying a shoe, but instead of threading the loose end all the way under, you only do it partly:
Insert Needle And Collect Samples
- Each device is slightly different, but you’ll usually want to use two fingers to pinch the device on the sides to have a good grip. The video above is a good demonstration of the overall process.
- Prep the site, usually with alcohol swabs
- Anchor the vein/extremity
- Grip the extremity like holding a can, just below the insertion site. This secures the patient’s limb to minimize movement and make for a more steady procedure.
- Now just put your left thumb below/distal to the insertion site
- Push with your thumb and pull down with medium pressure
- This anchoring helps prevent “rolling” of the vein while inserting the needle/catheter.
- Veins are also highly compressible, so you want to avoid too much pressure or the vein will compress and it will be harder to cannulate.
- You can anchor from above. But if you anchor from below then the needle is pointing in the opposite direction of your thumb, minimizing the risk of a needle stick.
- Push with your thumb and pull down with medium pressure
- Insert your needle/catheter
- Usually a constant shallow angle (<=30 degrees) the entire way should work well
- If you’re starting just distal to the vein, this shallow angle works
- If you’re right on top of the vein at your insertion site and have less distance to travel, you might start with a sharper angle just to get into the vein quickly, and then flatten out your angle.
- Secure the needle tip in the lumen:
- A pop and loss of resistance is usually felt when entering the vein.
- If using a device with a flash chamber you might see a flash of blood
- If it’s partially in then some blood can come out and cause a hematoma
- If it’s barely into the lumen it might pull out easily while trying to collect all your samples
- If you advance too much you might just advance the lumen out of the vein.
- A pop and loss of resistance is usually felt when entering the vein.
Remove the Needle
- Use your non-dominant hand to remove the tourniquet.
- Remove your last blood collection container from the collection device.
- Have your gauze pad/tape ready in your non-dominant hand.
- Remove the needle and apply the gauze pad almost simultaneously (but be sure the needle is cleared from the site so you don’t risk puncturing yourself)
- If the needle has a safety closure apparatus, use it now to cap off the needle.
- Apply some pressure over the insertion site
- Ask the patient to hold pressure and you can finish up.
Finish Up
- Immediately label all your specimens per your institution’s policies. Usually this includes at least the patient name and collection date/time.
Tips
- Smooth hand control and handoffs
- The steps above are generally pretty straightforward.
- This trick to this procedure is getting good/comfortable with all the little movements and fine control with your hands:
- E.g., keeping the needle still, switching hands as needed, doing two things with one hand like pulling off the tourniquet while mixing tubes, etc.
- Use slow, deliberate movements, think ahead.
- Be Steady
- One of the trickiest parts of the procedure is keeping the needle steady as you collect your samples:
- Setup at the beginning so the patient is in a comfortable, neutral position and doesn’t move.
- Learn to always be cognizant of the hand that’s holding the needle, even while multitasking with your other hand.
- Blood collection tubes
- The full details of proper collection tubes, protocols, order of draw is beyond the scope of this article, but is important to know. See references
- Vacuum sealed tubes are collected with an adapter, which don’t have flash chambers.
- Experience/feel will teach you when your needle is in the lumen and when to attach the first tube.
- Tubes with additives require mixing. DON’T shake, just gently rotate the tubes several times.
- If using a syringe, first expel all air out of the syringe and make sure the plunger moves freely so it’ll be easy to operate when drawing blood.
- Blood flow stops
- Your needle is at a shallow angle and the bevel may push up against a vein wall.
- Slight adjustments in angle during filling might fix this.
References
- Best practices in phlebotomy
- Very comprehensive, detailed read with step by step technique
- Videos
- Venepuncture – How to take a blood sample – OSCE Guide
- Geeky Medics video showing technique
- Performing a venipuncture using a butterfly needle
- Playlist of several technique videos from the Center for Phlebotomy Education
- Venepuncture – How to take a blood sample – OSCE Guide
- Simple step by step guide
- Center for Phlebotomy Education: The Order of Draw
- Mundane but important small steps (labeling, patient identification, cleaning, etc.): Preanalytical Errors: Real People, Real Suffering